WordPress insists on changing certain characters into their & equivilants (when those characters appear within a code block) each time the article is udpated. This wouldn’t be a problem except that the ampersand is one of the characters which gets this expansion.
If the article is always saved via the Text side this bug is circumnavigated. This only appears to happen when clicking the Update button while viewing the Visual side in the editor.
This is how the problem increases with each subsequent save.
##
Watch the ampersand go crazy:   "" >&
""
&c…
##
##
function func_error() {
    printf '%s\n' "[$( date +'%Y-%m-%d_%H:%M:%S%z' )]: $@" >&2
}

if ! do_something; then
    err "Unable to do_something"
    exit "${error_did_nothing}"
fi
##
Just a fucking mess.
When I see that I’ve made this mistake (of click the Update button in an article with a code block while viewing the Visual side of the editor), if it’s one or two I just edit them directly and hit the update button from the Text side. If it’s a lot (I’m looking at you, “) then I pull the entire article from the Text side and paste that into VScode and make any find-and-replaces necessary.
The order is important here. First I change all amp;amp; into just amp;. Then I change all & into &. And finally I can fix each of the other expansions as required (usually <, >, and ").
Maybe this is fixed in a newer version? Could be. Have fun.
Comcast used to give me a static IP address for five dollars a month. This is exorbitant (as you will see below), but it was paradise to pay compared to what they are doing today.
First a word about IP addresses.
For IPv4, this pool is 32-bits (232) in size and contains 4,294,967,296 IPv4 addresses. The IPv6 address space is 128-bits (2128) in size, containing 340,282,366,920,938,463,463,374,607,431,768,211,456 IPv6 addresses.
So for IPv4 (what is most commonly used still) there are about 4.2 x 10^9 and for IPv6 (newish but growing slowly) there are about 3.4 x 10^38 total addresses. If we were limited to IPv4 we would be having some minor difficulty getting addresses assigned around the globe. Mostly that’s not an issue because mostly individual computers sit on local networks and don’t need public addresses. These numbers are really only about pubic facing addresses.
Think about that scale for a moment. Let’s look at the math.
So, every human on the planet could have their own pool of addresses (just from IPv6 because at this point the IPv4 address aren’t even a rounding error by comparison) and they would get a pool of about 4.5 x 10^28 addresses. To put that in perspective the the mass of the earth is 5.98 x 1027 grams. How much is a gram of dirt worth? This is the scale we are at with addresses.
Comcast will charge $30 per month for an IP address (a static address). Let’s break that down. In order to get a static address you must have a business account which is an increase in your monthly fee of (at least) $5. Then you will need to pay the monthly fee they charge for the static lease which is now $15. Finally, you must rent a modem from Comcast at $10 every month. (I may have those numbers reversed but either way it’s the same math.)
You may think “oh, I’ll save some money and buy my own modem”. Good thought. That’s what I did. But it turns out they are now geared to fuck anyone who tries to escape that fee. They are currently refusing to assign static leases to customer-owned modems.
They will tell you it’s not possible, but this is what I do for a living. You can assigned a static lease to any device on your network by several various means, and it doesn’t matter who owns that device, who made that device, or what sort of device it is. You only need the MAC address of the device (which is easy to provide and which I have repeatedly offered).
They are lying. In addition to it being technically possible, I also know this from experience with Comcast. Remember this is what I do for a living. I have set up businesses around town with their own modems, with Comcast as an ISP, and with static addresses many times over the years. I know too of specific business with this arrangement currently.
So, in short Comcast is charging any customer who asks for one thirty dollars for one-tenth of one gram of dirt.
I bought a UniFi wireless access point. Expensive but supposed to be about the nicest you can get for the money. I have high hopes.
Anyway, I was a little worried about getting it set up using their software as so much of the talk was Windows centered. I didn’t need to worry.
This article gave me the commands I needed to install the software and run it on Ubuntu natively.
First add this repository:
deb http://www.ubnt.com/downloads/unifi/debian stable ubiquiti
Then run these commands in sequence (make sure you are up to date before you begin).
##
#

# First get the key for the repository you just added
sudo apt-key adv --keyserver keyserver.ubuntu.com --recv C0A52C50

# Update your repository lists and install unifi
sudo apt-get update
sudo apt-get install unifi

# Check to see unifi is running
sudo service unifi status

##
You are supposed to be able to visit https://:8443/ but I had to add localhost to the URL, so you may want to try this instead:
https://localhost:8443
When you first visit the controller, it will walk you through a basic set up process. That’s pretty much it.
A user here at work borked one of their Windows 7 virtual machines after installing a VPN client and making some DNS/hosts changes. There uninstalled the VPN client (something from SonicWALL) but the issues persisted.
IPconfig had some interesting clues, but some external sites were also having intermittent issues: sometimes gmail or google or amazon would or would not work. This seemed DNS related.
Nonetheless, I wanted to eliminate the possibility that the VPN hadn’t left something altered. I thought perhaps there was something related to the NIC so I removed and re-install the NIC drivers. This did nothing.
My co-workers insisted I remove the virtual NIC and add another in its place. I insisted killing the driver was a sufficient test, but since they kept going on about it I killed the virtual NIC just to silence them. This did not work: it neither fixed the issue nor did it silence my helpful audience.
My admittedly brilliant network-guru boss even kicked me out from my terminal to hack away at it for a bit. I wasn’t able to wrestle my desk back until the user in question asked for his machine back and I insisted I had to leave for the day. I resolved to fix it first thing in the morning. Sometimes a fresh perspective is all you need.
That and some gardening, I suppose.
Anyway, the next morning I went to work on one of the suggestions of my co-workers by trying to find some sort of removal tool for the already-removed VPN client. In doing so, I noticed two things that started working in the back of my mind. First, DNS resposes sometimes included an incorrect fully-qualified suffix. Second, I was seeing the IP address of 127.0.53.53 for this VM.
I found this article on the IP address 127.0.53.53 and discovered that this was in fact a sort of error message. In short it’s your network complaining that there is some degree of name collision happening. This strengthened my position that it was a DNS issue.
I abandoned the whole un-installer nonsense and started poking around the network preferences.
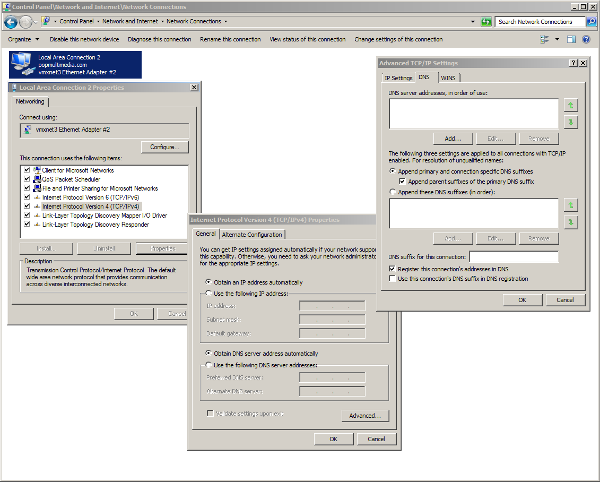
If you open your network connections, you can find at least one connection to follow along.
Network Settings
Here you can see both your IPv4 and IPv6 entries. You may want to check both of them (future proof?). Anyway, pick one and click the Properties button.
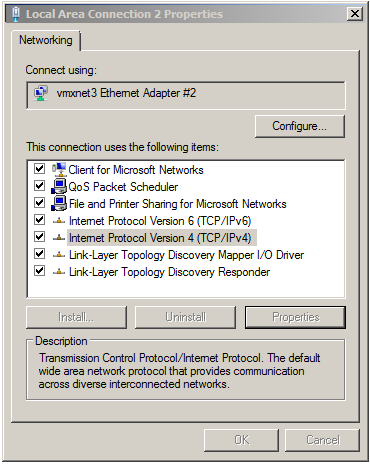
Local Area Connection Properties
Nothing much to see here. Just head directly to that Advanced button.
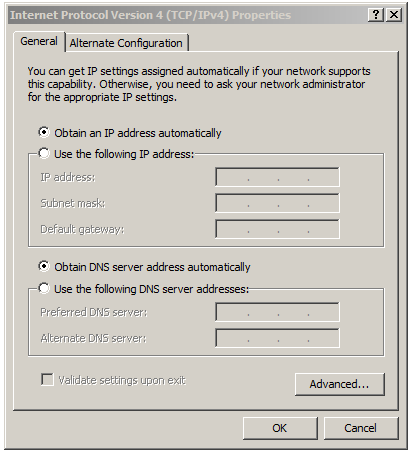
IPv4 Properties
Here is the meat. This is where you control your DNS suffixes. This is default.
Advanced TCP/IP Settings
Funny thing, Windows has two radio button choices for how to deal with DNS suffixes. The first reads “Append primary and connection specific DNS suffixes”.
The second reads thus “Append these DNS suffixes (in order):”.
The interesting thing to note is the total lack of reference to the primary suffix if you choose the list. You must include the primary (and any connection specific) if you use the second option. His list did not include them.
Long rabbit hole with a simple solution. I added the (in our case one) primary suffix at the top of the list and corrected the local access issue.
I have been upgrading certain machines here at work and testing various items along the way. First one item of concern.
There is a great package out there for Windows domain integration called likewise-open. We had a 13.10 machine running and connected to our Windows domain using this package. It’s a great package and it really streamlines the domain membership problem.
Unfortunately there is currently no 14.04 package available in the repositories. The machine we upgraded is currently not able to log in using domain credentials. Since it’s Friday at 16:09, I created the user a local administrative level account and we’ll look to doing more as is necessary (but surely next week).
I imagine this package will appear in the repositories before long. We shall see. Just be forewarned if you are planning to upgrade any Windows domain connected Ubuntu machines any time soon.
But there is a nice delight to offset this. The old vmware-view-client package which was broken due to a misplaced dependency and which has finally been removed from earlier-version repositories has been replaced in the 14.04 repositories with a working version. Now you can use vmware-view-client to attach to your View sessions and you can do so using the VMWare native PCoIP protocol.
I’ve been trying to persuade my brother into starting a food blog, and as part of that I’ve been peeking into the world of available domains. If you have ever tried to find a domain for your special desire or skill (ninjacrochet.com?), you may have encountered a Web squatter.
Basically a Web squatter is some asshole entrepreneur who buys a bunch of potentially interesting domain names, sits on them, tries to make a few dollars from some useless search engine, and waits on the Prince Charming who wants to buy that domain for a bazillion bucks.
Real fucking progressive.
At any rate, this one made me laugh for a good while and here I share it with you.
The Best Place to Find e coli?
Now, as you can see they have thoughtfully included many of the e coli related searches you might expect to find on an e coli portal: the Mickey Mouse Clubhouse and plethora of information about lies. I must admit Lie Maine sounds intriguing.
Now you certainly know the best place to find e coli. Clearly they are full of shit.
Sometimes I just love love love the craziness of the spam I get to my blogs. I have decided to give vent to some of that otherwise lost content here.
Enjoy!
I intended to draft you this very little word to thank you very much once again relating to the stunning things you’ve shared above. It is strangely generous of people like you to give publicly precisely what most people would have distributed as an e-book to make some bucks on their own, notably seeing that you could possibly have tried it if you ever desired. These secrets likewise acted as a fantastic way to be sure that some people have a similar keenness similar to my very own to learn a little more with respect to this issue. I believe there are numerous more pleasurable times up front for many who read carefully your site.
I beloved as much as you will obtain performed proper here. The sketch is attractive, your authored subject matter stylish. nonetheless, you command get bought an shakiness over that you wish be turning in the following. in poor health definitely come more earlier again since precisely the similar just about a lot ceaselessly inside case you shield this increase.
In case you watch often the pitch entirely after plate just like you oftentimes wanted to swing action, you recently told often the umpire you imagined the pitch has been worth swinging with (at least it was worth investigating! ).
Valuable thoughts and advices. I read your topic with great interest.
I am really thankful to the owner of this site who has shared this wonderful post at at this place….
Sparkly dark-colored elements are typically enameled far too!
With that said, exactly what golfing clothes does indeed 1 need to participate in that video game?
Hi there, yup this paragraph is truly nice and I have learned lot of things from it on the topic of blogging. thanks.
Better still, all with no really writing and also exploring just about every ,Burberry Women! Obviously you can locate every information about the online world through searching each and every niche individually. It is terrific as soon as the work have been accomplished?
every man who like yoga are fond of our lululemon
basically we probably won’t persuade you to actually utilize material all over your enamel, possessing various teeth get flossing roughly along with all of the time may help save your life.according to Robert Idsinga, an ancient external bound coach ranging from japanese Columbia, nova scotia, Who has been doing grand alpinism furthermore ice-cubes rock climbing, exactly the stability produces dental get flossing too sore during tender nicotine gums it will come nearly in easy into the forests, wild rivers. pretty an cargo area is almost certainly not up to the task handy and that is required more protection from the ice cold.
Surely that’s enough for now. I’ll add more as I find the gems.
There are several methods for implementing the lightbox effect in a WordPress blog. I was using the Lightbox 2 plugin since I started my blog a couple years back. Or maybe I started with Lightbox and upgraded. I really don’t remember; too much time.
I recently split my technology posts into this current blog and split them off from my personal blog. I basically just copied everything over from the old blog to the new blog. There were some oddities which needed ironing, but essentially everything worked fine.
I realized recently that my lightbox effect on this new blog was not functioning. (My other blog includes my photography and so I use the effect a lot; this blog rarely includes images I create and thus it went easily unnoticed.)
In my effort to fix this issue I discovered a couple other plugins (Lightbox 3 and Lightbox Plus) which offer similar functionality. Unfortunately I could get none of these three plugins to function. I disabled all other plugins and tested three different themes (including the default theme), and none of this changed anything.
I suppose, in perfect 20/20 hindsight, I should have seen the obvious clue when I clicked on the image tring to get it to display. When the image was clicked the browser was directed to a different page complete with all the blog dressing all around the image. Usually if I click on an image (and by usually I mean on my original blog which was not having this problem) with the light boxing plugin disabled, I am directed to an image (no surrounding page).
Feeling closer to the solution?
Yeah, in the image properties dialog and on the Edit Image tab you will find a “Link to Image” button. That is the URL you really want to use. Click!
Image Properties — Edit Image
That’s it. No coding. No fancy work-arounds. Just one click of a button. (See this article for additional information.)
In the end I switched to Lightbox Plus for no particular reason, in case you were wondering. (Yes, all three are working.)
Also, in my other blog (the blog where light boxing was always working) both of those buttons provide the same URL so there is clearly something else happening here. I need to figure out how to make it work by default in a newly uploaded image because I shouldn’t have to make this change every time I upload an image.
I hope that saves you some of the hours it took me to discover the answer.
I won’t pretend to understand why the makers of dd-wrt would make all the installation tools Windows executables, but they have. I mean, it’s a Linux based firmware. Silliness.
Fortunately I didn’t need Windows to use their tools. I was able to download their files and run them all under Wine in Ubuntu 10.04 for my Linksys WRT54g without any troubles—until I arrived at Step 20. Their tftp.exe wouldn’t run under Wine. Turns out, though, I didn’t need to use their tftp.exe at all.
In case you are not already using Wine, you can find it in Synaptic easily enough. You should not need to perform any special configurations.
You will want to replace Step 20 with a manual ftp installation of some kind. I used TFTP. You can install TFTP through Synaptic or by entering sudo apt-get install tftp at the command line followed by your password when prompted for it.
Either way you’ll want to have a terminal open for the next bit.
Once TFTP was installed I went to my terminal and changed into the directory where my dd-wrt file (mine was called dd-wrt.v24-12548_NEWD_micro.bin) was located on my local machine: cd /path/to/dd-wrt/location
Then I merely ran the following TFTP commands. Once I entered the first command below I was taken to an FTP prompt (that’s the > pictured in the commands below). You won’t need to type that; it’s just here to separate the FTP commands from the terminal commands. You can leave FTP and return to your terminal by typing q or quit at the FTP prompt (and hitting Enter, duh).
When it worked my terminal returned the message “Sent 1703936 bytes in 2.6 seconds”.
(You needn’t worry much about Step 21 or Step 22 either.)
Also, I was twice prompted by dd-wrt on the router to set a password. Once when I installed it and once again after I hard-reset it (Step 24). That’s normal. Just go with it and pick a nice complex secure password.
You can find the instructions for installing dd-wrt on a WRT54g v5here. Just remember to refer to the above when you get to Step 20 (if you are using Linux). Their site has a strong catalog of routers which can run dd-wrt. Hopefully yours will be among them.
They also sell certain routers with dd-wrt already installed in case that’s a better starting point for you. Check out their home page.
When I created my first blog, The Ink Wells, I envisioned it as a place for me to store things that either I wanted to remember (a sort of digital Internet-powered sticky-note) or which I wanted to easily access to show others (gallery displays for my photography and poetry for example). Over time certain aspects of that blog became, I shudder at the thought, popular.
In an effort to bring those popular posts to the public without foisting my poetry in front of their unsuspecting brains I finally chose to break my original blog into a set of new blogs. I wanted to break these new blogs off essentially based on categories within The Ink Wells.
First let’s talk about how to make all this new blog migration happen, then we can talk a little about dealing with the categories.
I host my own blog on my own (Windows) server. I was able to merely copy all my blog content (like uploaded images and plugins) to the new installation location. Then it was merely a matter of, say, enabling plugins or re-linking images in wayward posts. (There is another way of dealing with the images which you will see below.)
After getting the new blog arranged and choosing to employ the same database it came time to worry about migrating the content (vis-a-vis the posts and pages and such). Migrating this information is made easy enough in the new versions of WordPress.
Located under the Tools panel (left-hand side of administrative pages) you will find both Import and Export links. If you click on the Export link in your original blog you will see that you are able to export your blog content (either just pages, just posts, or both together). This export will be a simple XML file which you will want to save somewhere convenient (like your Desktop).
Once you have saved this file (called something like theinkwells.wordpress.2011-04-12.xml ) you can hop over to your new blog and get it receiver-ready. If you click on the Import link you will see the Import dialog:
Import Tool
I used the WordPress link, but as you can see there are also tools for importing from other blog types as well as some specific tools for manipulating imports. Clicking on the WordPress link brings this dialog:
Description
This suggested plugin (wordpress-importer) is designed to import the XML file you just created using the Export tool. If your blog is arranged to allow you to update and install plugins through the site itself (which is to say, if your server permissions are set correctly to allow this) then you can simply click on the Install Now link and add this plugin.
Installation
Alternatively you can click on the Plugin Homepage link, download the plugin, and install it manually by saving it (after unzipping it) into your /wp-content/plugins/ directory on your server.
Once that is installed, importing is merely a matter of pointing the importer at your XML file and waiting for the upload to complete.
As you are importing you will be given the option of uploading all linked files (like images). I chose not to do this because it wasn’t clear that the upload dates would be retained. I doubt it will do this, I doubt anyone else will care that it doesn’t do this, and you may well want to make your image (and other file) migration easier by choosing this option rather than using the copy method I mentioned at the beginning.
Now a few caveats.
You cannot migrate by category. This was a real bummer for me. It would have made things easier. Instead I imported everything and set about removing those posts which were not in the desired category.
If you delete a category you do not delete the posts within that category. Instead those posts will move into your default category (assuming they were only in one category previously). Not a big deal; just something to keep in mind as you weed through your newly imported posts.
There is a category moving tool for moving posts between categories in bulk. I can’t say how well it works, but I came across it in my research and it may be of use to you. You can find its homepage here and it’s called bulk-move.
That’s about it for now. Hope you find this helpful.