The following is a method for creating a keyboard shortcut on a Mac such that the shortcut will lock the screen. This method involves using the Mac’s Automator and a bit of shell script. It is also important to set certain settings. We are going to show two different shortcut options. They can be run in parallel if desired. They also may be modified within reason and remain equally effective.
Launch Automator
- From Automator choose File –> New –> Service which will open a new automation dialog
- Here you have two (inclusive) options:
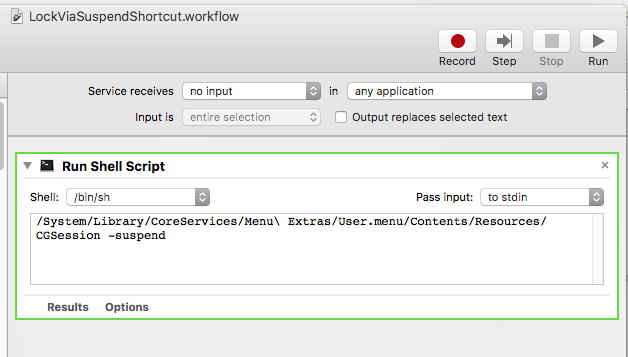
- From the automation dialog select Utilities from the left-hand pane and then Run Shell Script
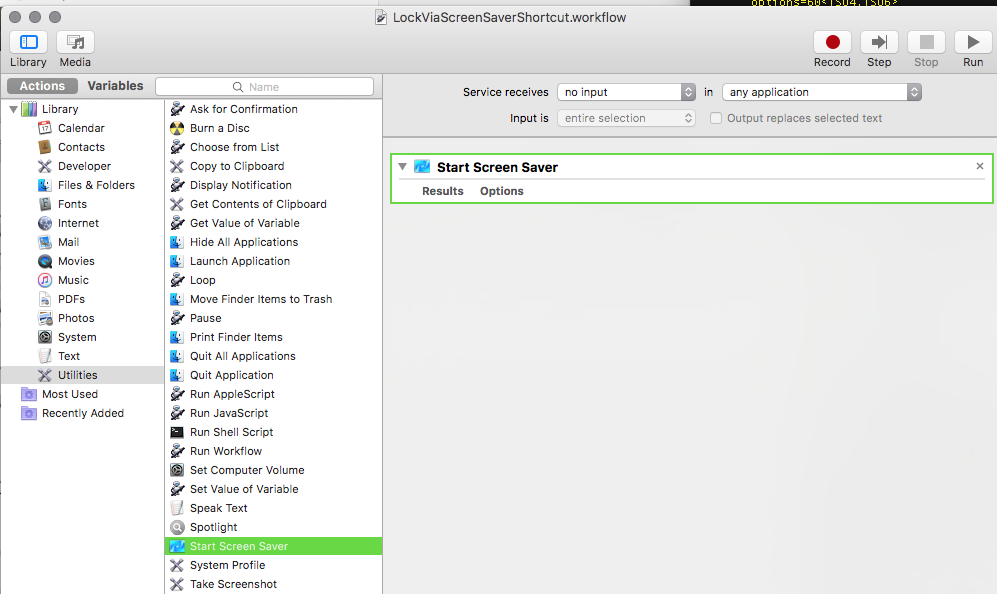
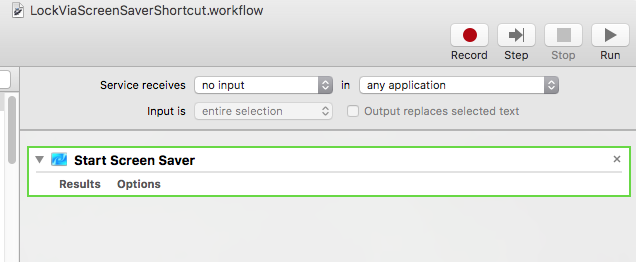
- From the automation dialog select Utilities from the left-hand pane and then Start Screen Saver (pictured)

- What’s the difference?
- The shell script puts the system directly into the suspended state.
- Suspending the system (via script) is slower but requires no additional settings.
- Launching the screen saver does just that.
- Launching the screen saver requires certain screen saver settings (below) and is faster.
The Automation (Two Options)
- This is the line of code for you to copy and paste as below: /System/Library/CoreServices/Menu\ Extras/User.menu/Contents/Resources/CGSession -suspend
- Again you will follow either the Run Shell Script path or the Start Screen Saver path:
- Note the “no input” and the “any application” settings in both drop-downs for both methods below.
Via Shell Script (using Suspend):
- Call the Run Shell Script something clear: LockViaSuspendShortcut
- This is the line of code for you to copy and paste as above: /System/Library/CoreServices/Menu\ Extras/User.menu/Contents/Resources/CGSession -suspend
- You will see the argument -switchToUserID for CGSession as well. This does not lock the screen. Do not use it.)
- The Shell Script method (using suspend):

Via the Screen Saver:
- … or Call the Start the Screen Saver something clear: LockViaScreenSaver
- The Start the Screen Saver method:

Note:
- If you need to delete an Automator Workflow, you can locate them in ~/Library/Services/
- It may be possible to make an automation available to all users (untested) by placing it in /Library/Application Support/Apple/Automator/
Set Up the Keyboard Shortcut(s)
- Once you have created these automations, you will only need to assign a shortcut for each.
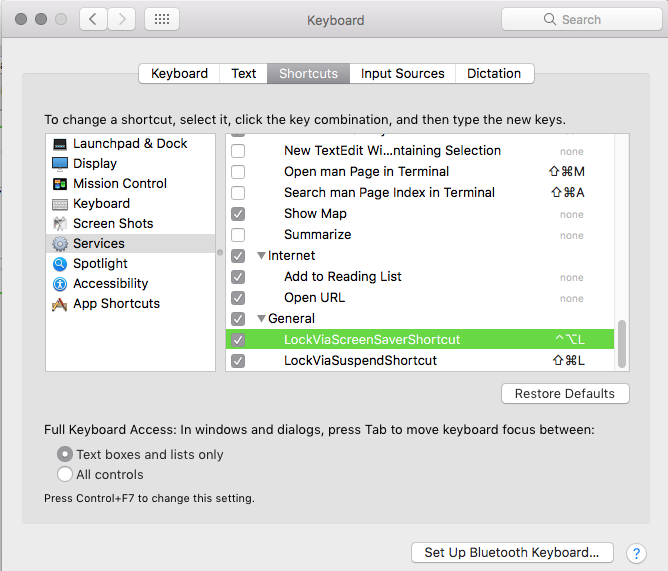
- Navigate to System Preferences –> Keyboard –> Shortcuts –> Services
- Since you have used clear names per the above, you will have no difficulty identifying which automation is which.

- The field to the right of the name of the automation holds the key combination.
- Choose what you’d like and choose wisely.
- LockViaScreenSaverShortcut is set as ctrl-alt-L
- LockViaSuspendShortcut is set as shift-super-L
- The mouse may need to be out of a VM in order for the shortcuts to be captured by the Mac.
Additional Screen Saver Settings
- Open System Preferences –> Desktop & Screen Saver –> Screen Saver
- Set “Start after:” as “5 Minutes“
- Open System Preferences –> Security & Privacy –> General
- Set “Require password” as “5 seconds”
- These fives seconds will give you a small buffer to keep your screen from locking if you are reading an article and it goes blank.